
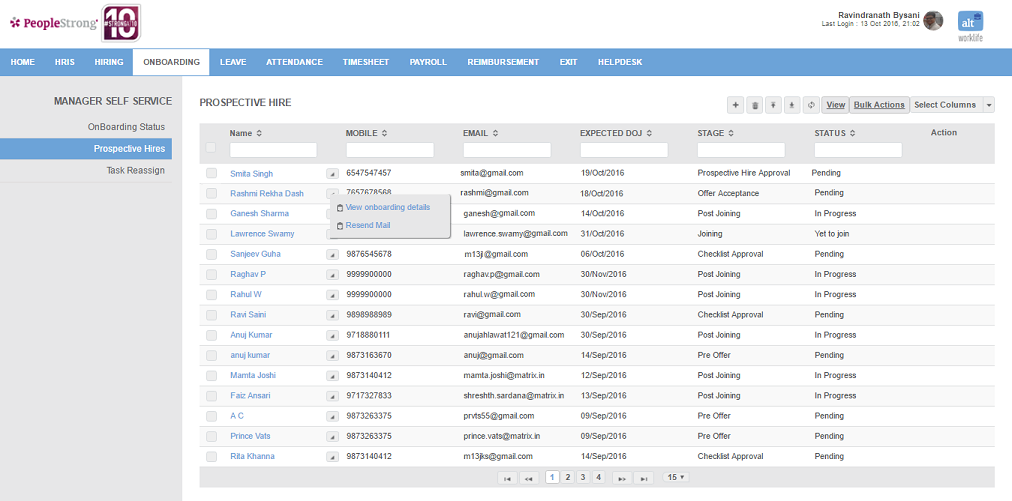
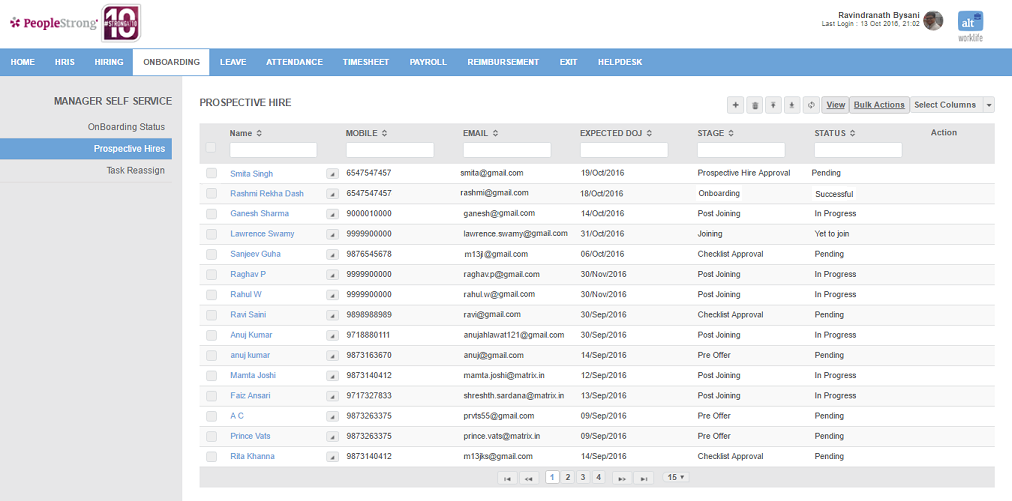
Prospective Hires page displays a list of prospective hires. You can filter the list on the basis of Name, Mobile, Email, Expected DOJ, Stage and Status.
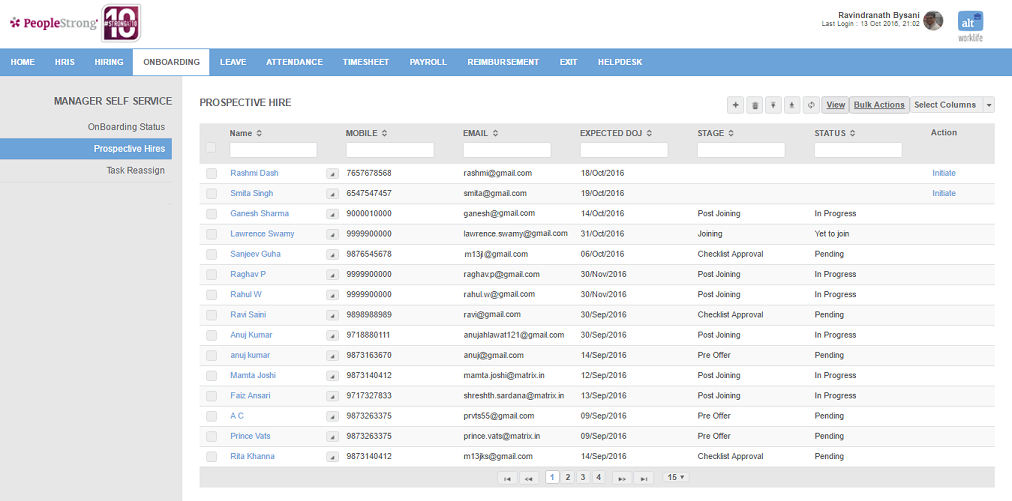
How to create a prospective hire?
1. Click + icon on top right. Following page will open.
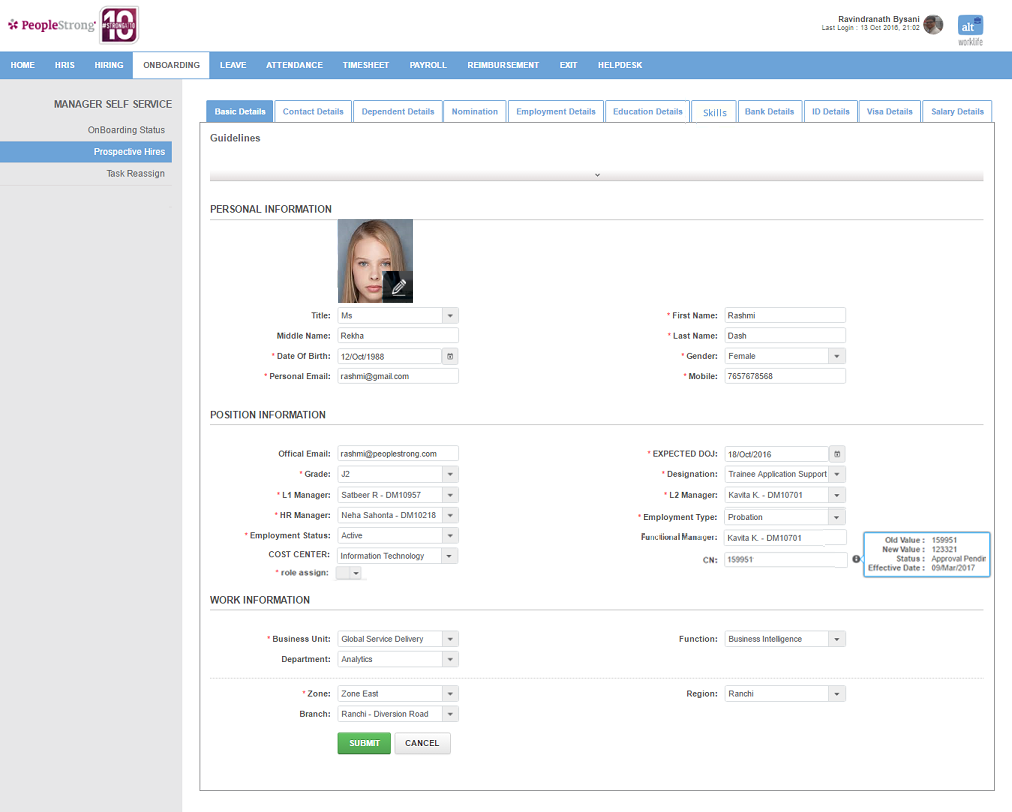
| Personal Information | |
| Title | Title of prospective hire. |
| First Name | First name of prospective hire. |
| Middle Name | Middle name of prospective hire. |
| Last Name | Last name of prospective hire. |
| Date of birth | Date of birth of prospective hire. |
| Gender | Gender of prospective hire. |
| Personal Email | Personal email address of prospective hire. |
| Mobile | Mobile number of prospective hire. |
| Position Information | |
| Official Email | Official email of prospective hire. |
| Expected DOJ | Expected date of joining of prospective hire. |
| Grade | Grade of prospective hire. |
| Designation | Designation of prospective hire. |
| L1 Manager | L1 Manager of prospective hire. |
| L2 Manager | L2 Manager of prospective hire. |
| HR Manager | Hr Manager of prospective hire. |
| Employment Type | Employment type of prospective hire. Select Probation for prospective hire. |
| Employment Status | Employment status of prospective hire. |
| Card Number (CN) | Card number or employee id of prospective hire. |
| Role Assign | list of roles. Role/s to be assigned to prospective hire. |
| Work Information | |
| Org Unit |
Org Unit hierarchy configured for prospective hire. E.g. Business Unit > Function > Department |
| Work Site |
Work Site hierarchy configured for prospective hire. E.g. Zone > Region > Branch |
2. Click pencil icon to select a profile picture.
3. Enter the required information.
4. Click Submit button.
5. Click Contact Details tab. Following page will open.
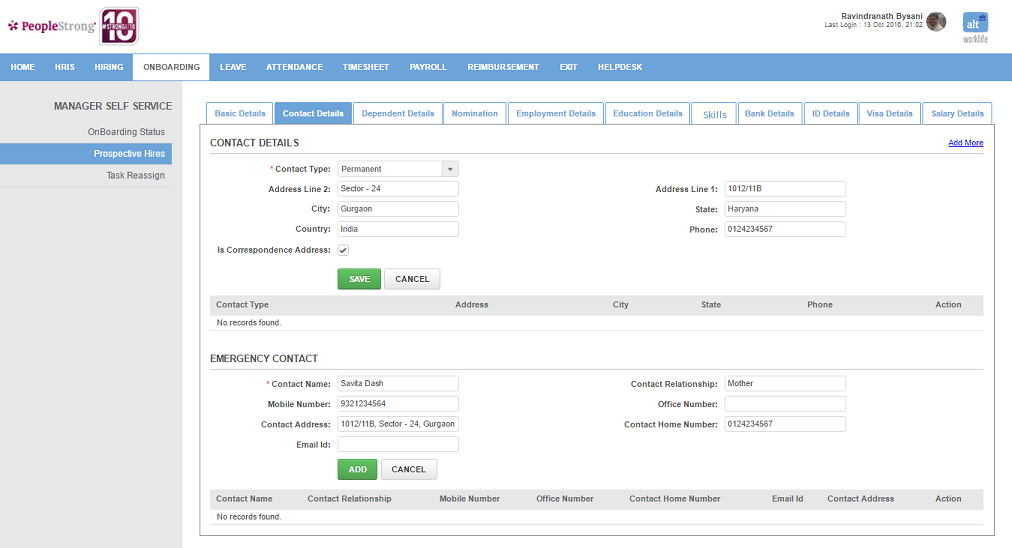
| Contact Details | |
| Contact Type | list of contact types. You can choose one. |
| Address Line 1 | address line 1 of prospective hire. |
| Address Line 2 | address line 2 of prospective hire. |
| City | city where prospective hire resides. |
| State | state where prospective hire resides. |
| Country | country where prospective hire resides. |
| Phone | phone number of prospective hire. |
| Is Correspondence Address | can be checked or unchecked. Indicates whether address should be used for correspondence or not. |
| Emergency Contact | |
| Contact Name | name of person to be contacted in case of emergency. |
| Contact Relationship | relationship between contact person and prospective hire. |
| Mobile Number | mobile number of contact person. |
| Office Number | official number of contact person. |
| Contact Address | contact address of contact person. |
| Contact Home Number | contact home number of contact person. |
| Email Id | email address of contact person. |
6. Enter the required details.
7. Click Save button to save contact details.
8. Click Add to save emergency contact.
9. Click Add More link on top right to save Official and Residence details.
10. Click Dependent Details tab. Following page will open.
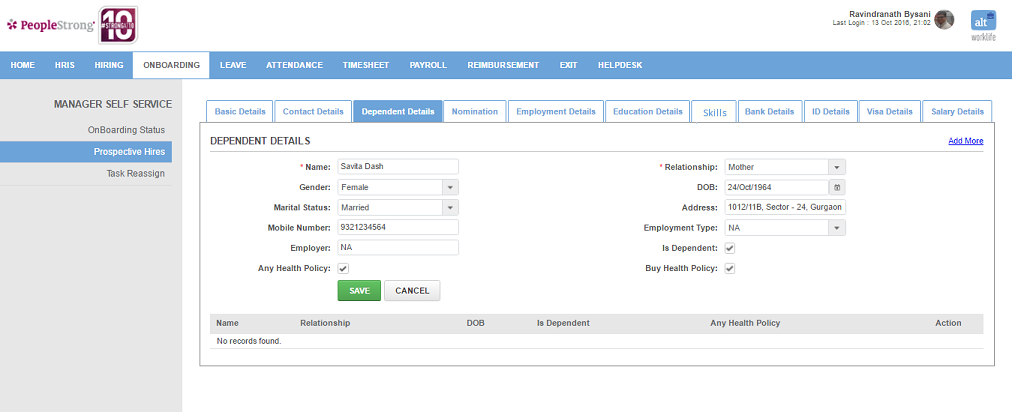
| Dependent Details | |
| Name | name of dependent. |
| Relationship | relationship with prospective hire. |
| Gender | gender of dependent. |
| DOB | date of birth of dependent. |
| Marital Status | marital status of dependent. |
| Address | address of dependent. |
| Mobile Number | mobile number of dependent. |
| Employment Type | list of employment types of dependent. You can choose one. |
| Employer | name of employer if dependent is employed. |
| Is Dependent | can be checked or unchecked. Indicates whether the person related to prospective hire is dependent on him or not. |
| Any Health Policy | can be checked or unchecked. Indicates whether dependent has any health policy or not. |
| Buy Health Policy | can be checked or unchecked. Indicates whether dependent wants to buy health policy or not. |
11. Enter the required information.
12. Click Save button to save dependent details.
13. Click Add More link on the top right to add more dependent details.
14. Click Nomination tab. Following page will open.
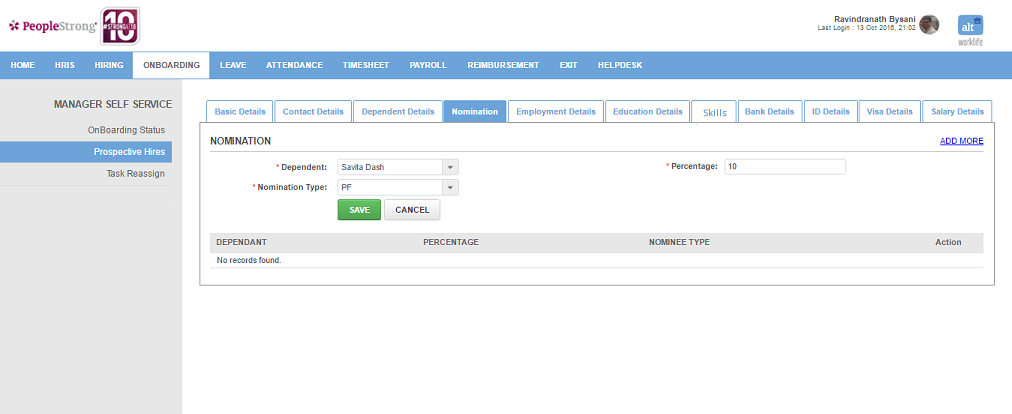
| Nomination | |
| Dependent | list of dependents. You can choose one. |
| Percentage | percentage share for dependent. |
| Nomination Type | list of nomination types. You can choose one. |
15. Enter the required information.
16. Click Save button to save the nomination details.
17. Click Add More link on the top right to add more nominees.
18. Click Employment Details tab. Following page will open.
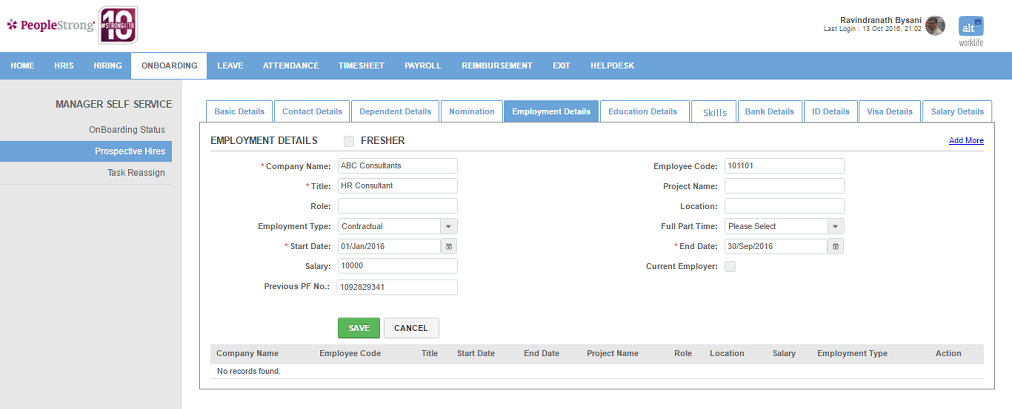
| Employment Details | |
| Company Name | previous company's name of prospective hire. |
| Employee Code | employee code of prospective hire. |
| Title | title of prospective hire |
| Project Name | project name handled by prospective hire. |
| Role | role of prospective hire. |
| Location | location of prospective hire. |
| Employment Type | list of employment type of prospective hire. You can choose one. |
| Full Part Time | choose one from full or part time. |
| Start Date | start date of employment of prospective hire. |
| End Date | end date of employment of prospective hire. |
| Salary | salary of prospective hire. |
| Current Employer | can be checked or unchecked. Indicates whether prospective hire is still employed with the company or not. |
19. Select Fresher. Go to step 21.
20. Enter the required details.
21. Click Save button to save employment details.
22. Click Add More link to add more employment details.
23. Click Education Details tab. Following page will open.
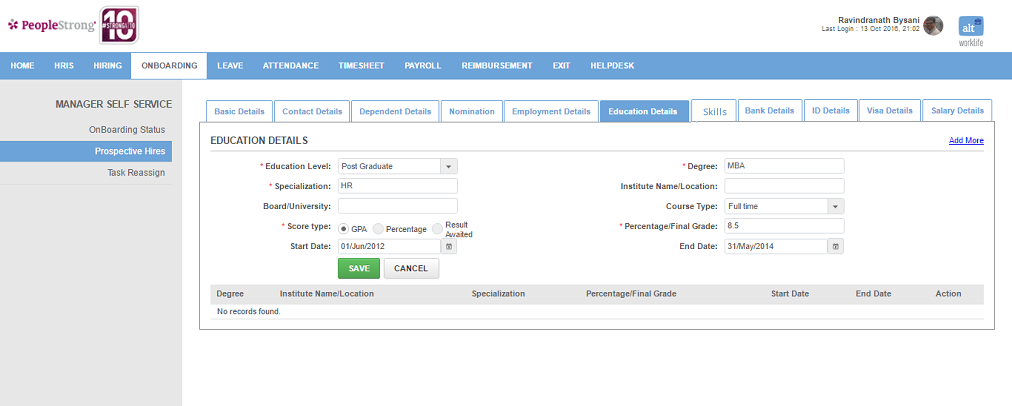
| Education Details | |
| Education Level | list of education levels. You can choose one. |
| Degree | degree of prospective hire. |
| Specialization | specialization of degree of prospective hire. |
| Institute Name/Location | institute name/location attended by prospective hire. |
| Board/University | board/university of prospective hire. |
| Course Type | list of course type. you can choose one. |
| Score Type | you can choose one from GPA, Percentage and Result Awaited |
| Percentage/Final Grade | percentage/final grade of prospective hire. |
| Start Date | start date of course. |
| End Date | end date of course. |
24. Enter the required details.
25. Click Save button to save education details.
26. Click Add More link to add more education details.
27. Click Skills tab. Following page will open.
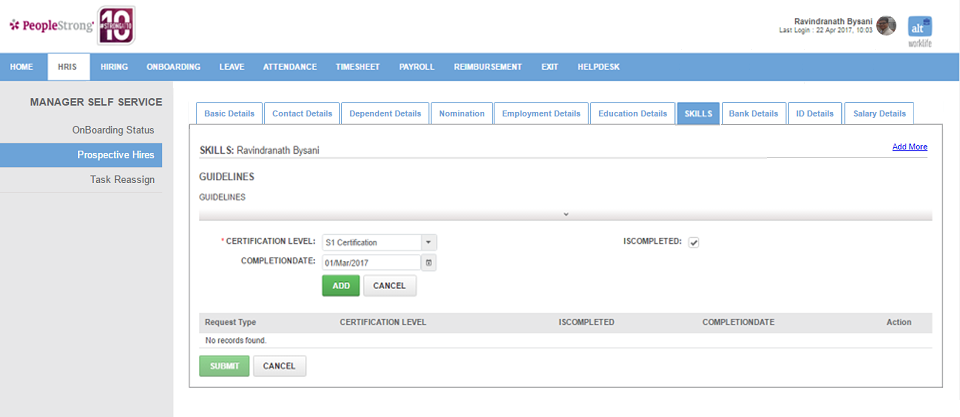
| Skills | |
| Certification Level | list of certifications. You can choose one. |
| Is Completed | can be checked or unchecked. Indicates whether certification is complete or not. |
| Completion Date | to be filled if above check box is checked. Completion date of Certification. |
28. Enter the required details.
29. Click Add button to save Certification details.
30. Click Add More link to add more certification details.
31. Click Bank Details tab. Following page will open.
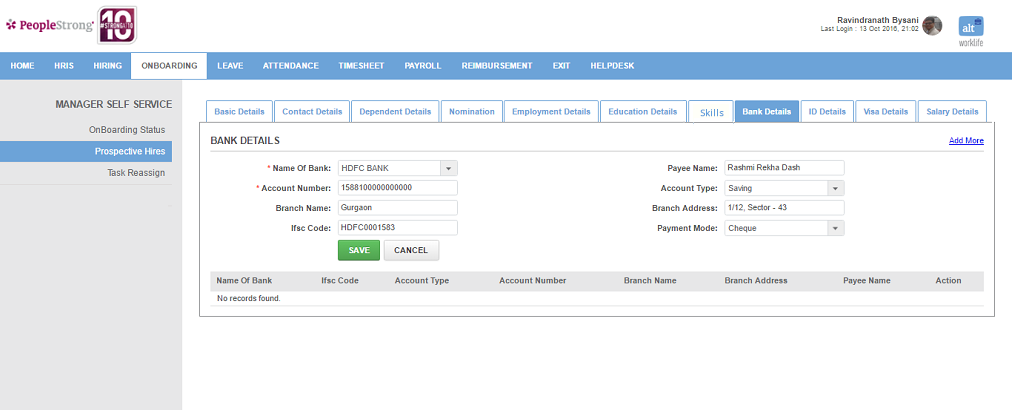
| Bank Details | |
| Name of Bank | list of banks. You can choose one. |
| Payee Name | name of payee. |
| Account Number | account number of payee. |
| Account Type | list of account types. You can choose one. |
| Branch Name | branch name of bank. |
| Branch Address | branch address of bank. |
| Ifsc Code | Ifsc code of account. |
| Payment Mode | list of payment modes. You can choose one. |
32. Enter the required details.
33. Click Save button to save bank details.
34. Click Add More link to add more bank details.
35. Click Bank Details tab. Following page will open.
36. Click Id Details tab. Following page will open.
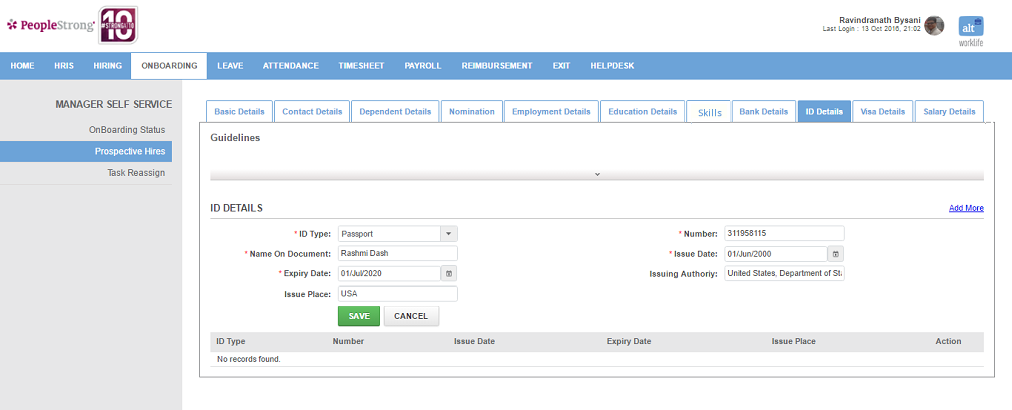
| ID Details | |
| ID Type | list of Id types. You can choose one. |
| Number | number on document. |
| Name On Document | name of prospective hire on document. |
| Issue Date | issue date of Id. |
| Expiry Date | expiry date of Id. |
| Issuing Authority | issuing authority of Id. |
| Issue Place | issuing place of Id. |
37. Enter the required details.
38. Click Save button to save id details.
39. Click Add More link to add more id details.
40. Click Visa Details tab. Following page will open.
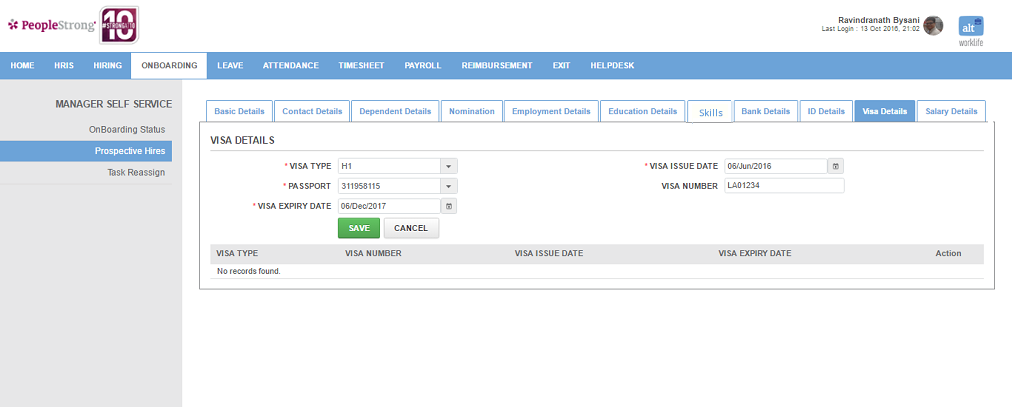
| Visa Details | |
| Visa Type | list of visa types. You can choose one. |
| Visa Issue Date | visa issue date for prospective hire. |
| Passport | list of passports. You can choose one. |
| Visa Number | visa number for prospective hire. |
| Visa Expiry Date | visa expiry date for prospective hire. |
41. Enter the required details.
42. Click Save button to save visa details.
43. Click Salary Details tab. Following page will open.
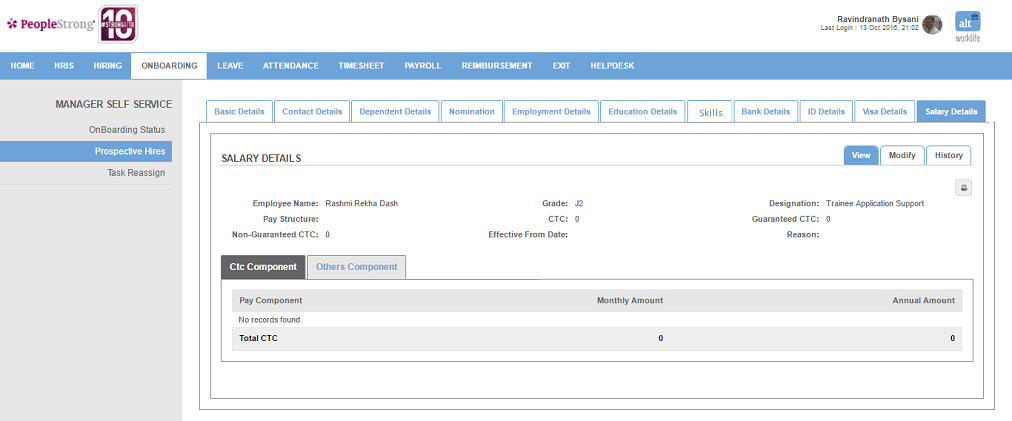
44. Click Modify tab.
45. Click Formula Based. Following page will be displayed.
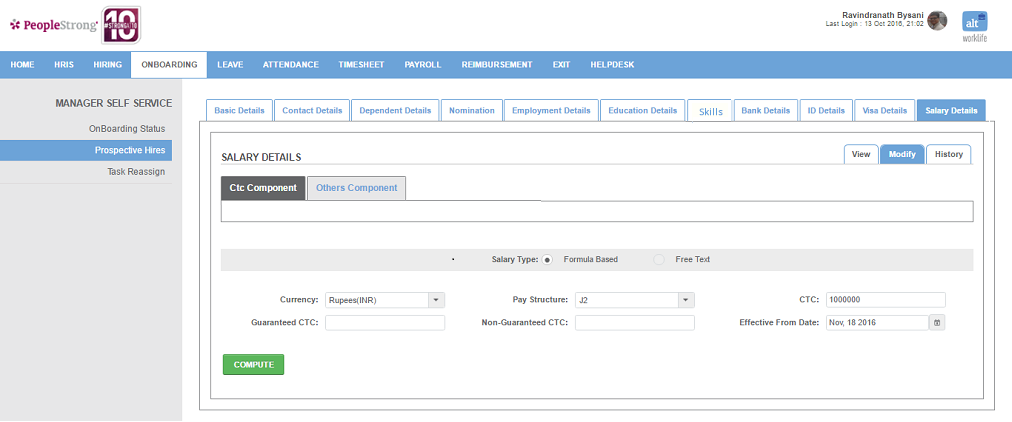
| Currency | list of currencies. You can choose one. |
| Pay Structure | list of pay structures. You can choose one. |
| CTC | annual salary. |
| Guaranteed CTC | guaranteed salary. Auto computed as per the pay structure selected. |
| Non-Guaranteed CTC | non guarantedd salary. Auto computed as per the pay structure selected. |
| Effective From Date | date from which CTC will become effective. |
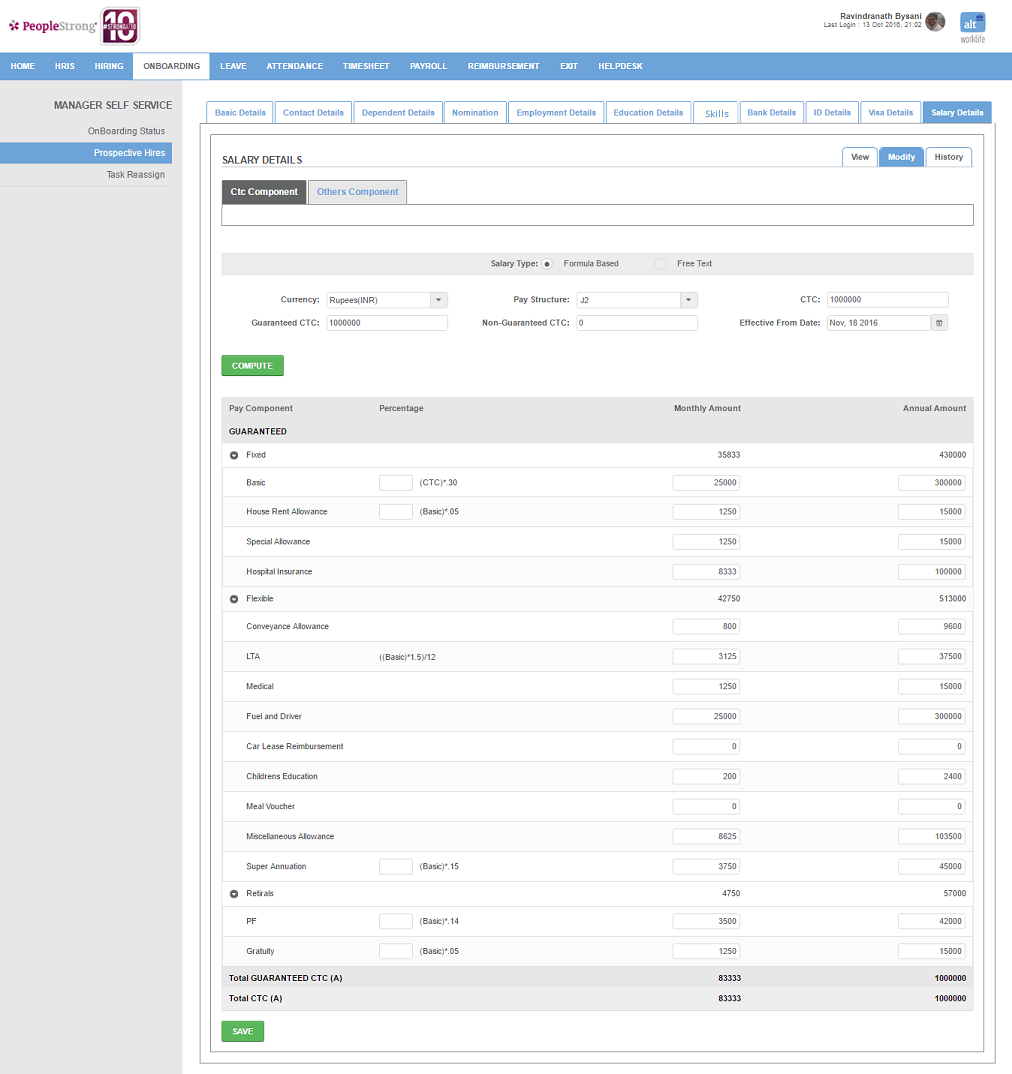
46. Enter the required details.
47. Click Compute button. Following page will be displayed.
48. Click Save button. Following pop up will open.
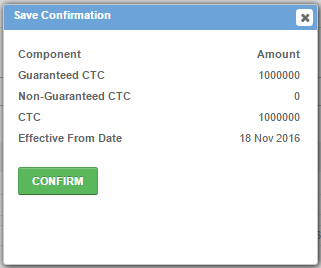
49. Click Confirm button to save salary details. Or
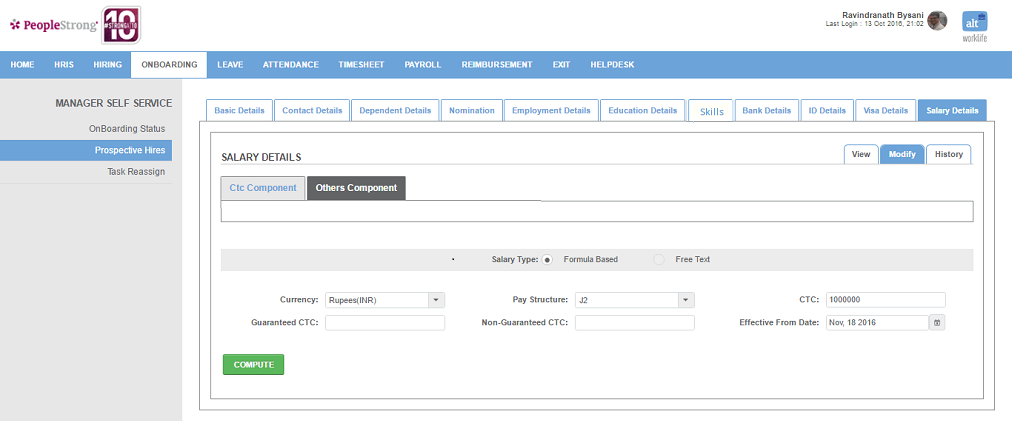
50. Click Free Text. Following page will be displayed.
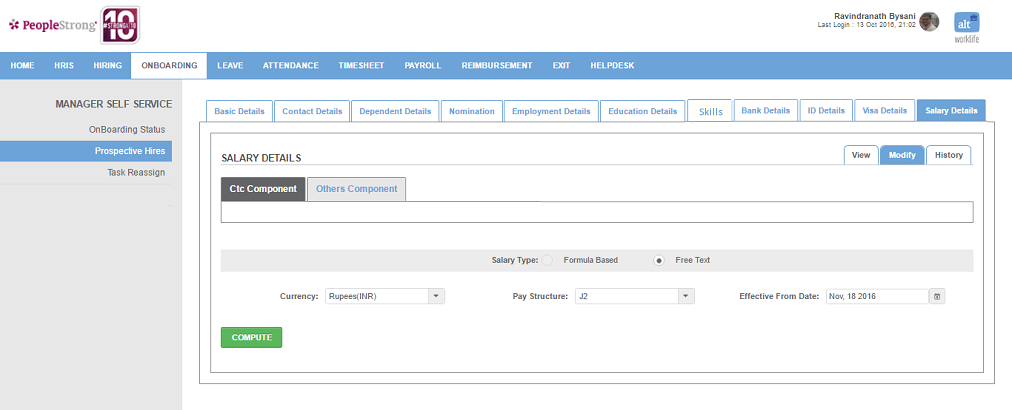
| Currency | list of currencies. You can choose one. |
| Pay Structure | list of pay structures. You can choose one. |
| Effective From Date | date from which CTC will become effective. |
51. Enter the required details.
52. Click Compute button. Following page will be displayed.
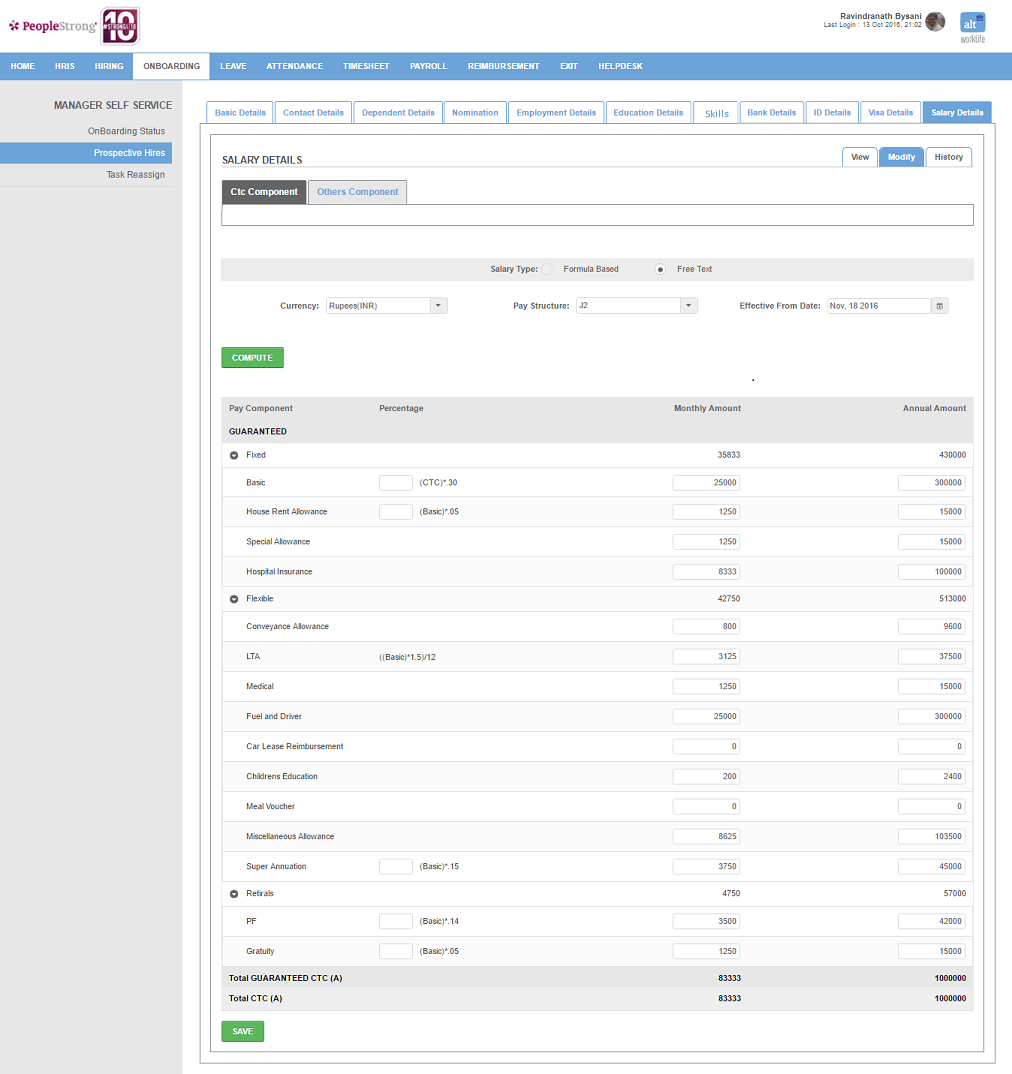
53. Enter the required details in pay components.
54. Click Save button. Following pop up will open.
55. Click Confirm button to save salary details.
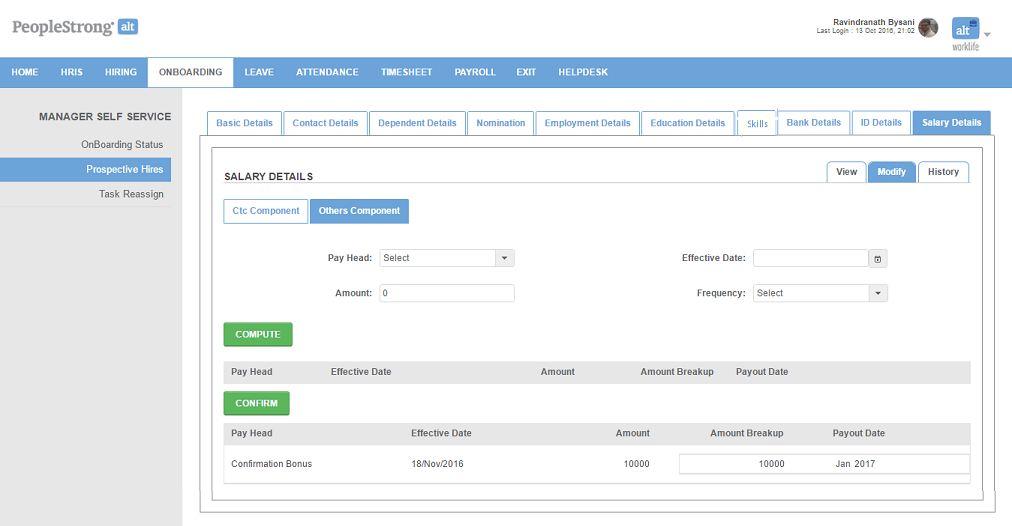
56. Click Other Component tab. Following page will open.
57. Click Modify button and + icon. Following page will open.
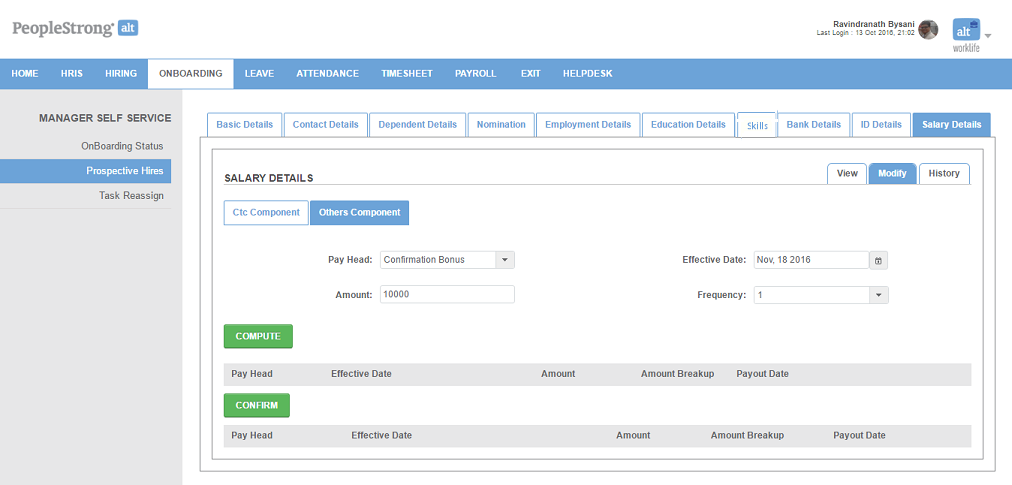
| Pay Head | list of pay heads. You can choose one. |
| Effective Date | date on which other component will be paid to the employee. |
| Amount | amount payable for other component. |
| Frequency | list of frequencies. You can choose one. Amount will be divided over the number of frequency chosen. |
58. Click Compute button. Following will be displayed in the page.
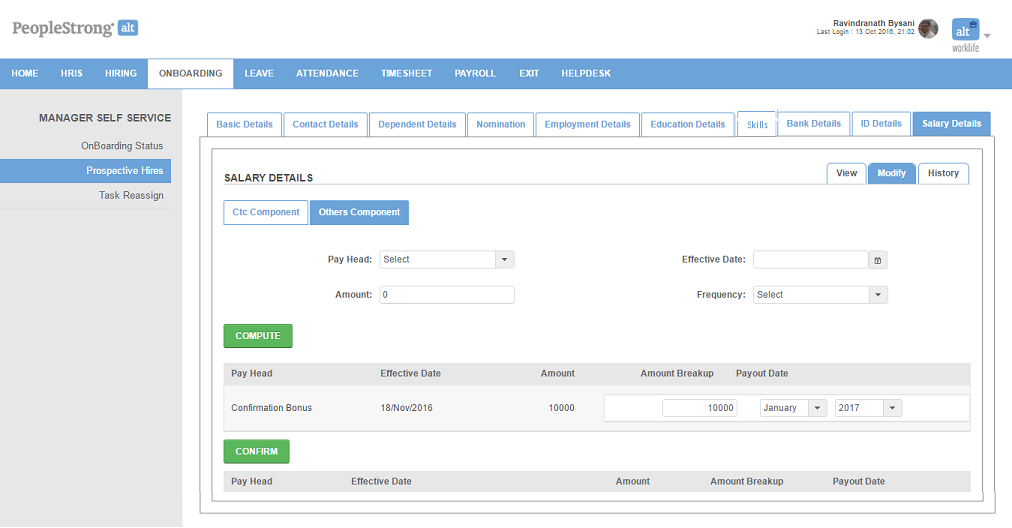
| Amount Breakup | amount payable over a period of time. |
| Payout Date | |
| Month | month in which amount breakup is payable. |
| Year | year in which amount breakup is payable. |
59. Enter the required information.
60. Click Confirm button. Following will be displayed in the page.
Note: You can edit prospective hire details by clicking  icon. This can be done only before the onboarding process begins.
How to bulk upload prospective hires?
1. Click  icon. Following page will open:
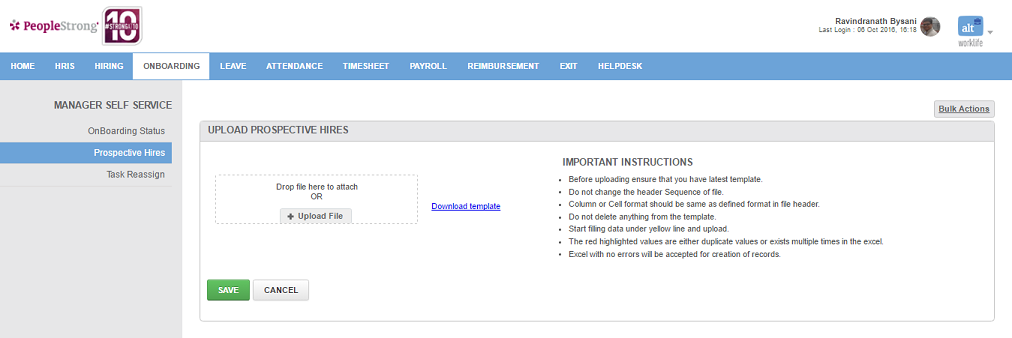
2. Click Download Template link. Excel template will get downloaded to your pc.
3. Enter the prospective hires details in the excel file.
4. Click + Upload File button to upload the excel file.
Note: Records will be divided into valid records and records with errors under Valid Records and Error Records tabs respectively.
5. Click Save button.
How to initiate on boarding process?
1. Click Initiate link in the Action column of the prospective hires list.
2. Alternatively, you can select the prospective hires and click Bulk Action button to start on boarding process of multiple candidates.

Note: Stage and Status columns now display Prospective Hire Approval and Pending respectively.
3. Go to How to approve a prospective hire? on Onboarding Status page.
How to complete offer generation?

1. Click View Onboarding Details link on the drop down when icon is clicked. Following page will open.
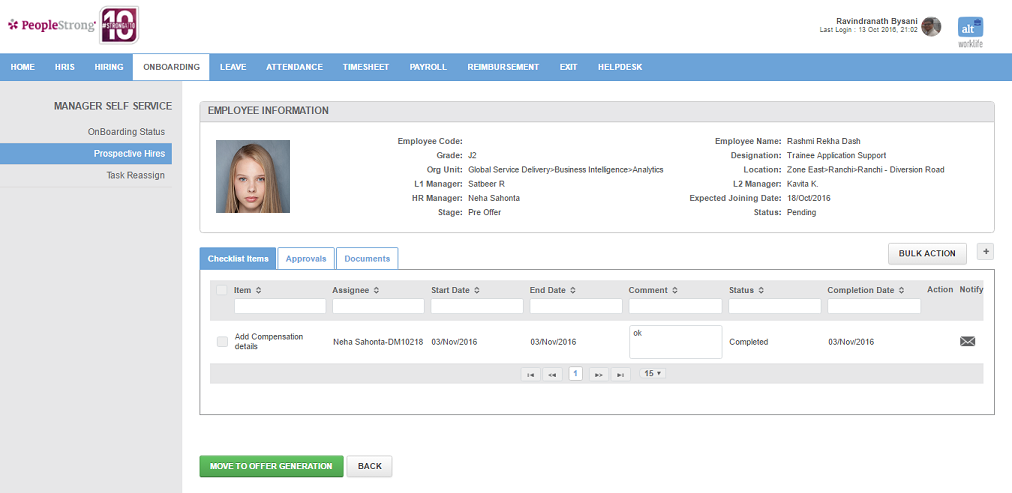
2. Click Move To Offer Generation button. Stage and Status columns now display Offer Generation and Pending respectively.
3. Go to How to complete offer generation? on Onboarding Status page.
How to complete offer acceptance?

1. Click View Onboarding Details link on the drop down when icon is clicked. Following page will open.
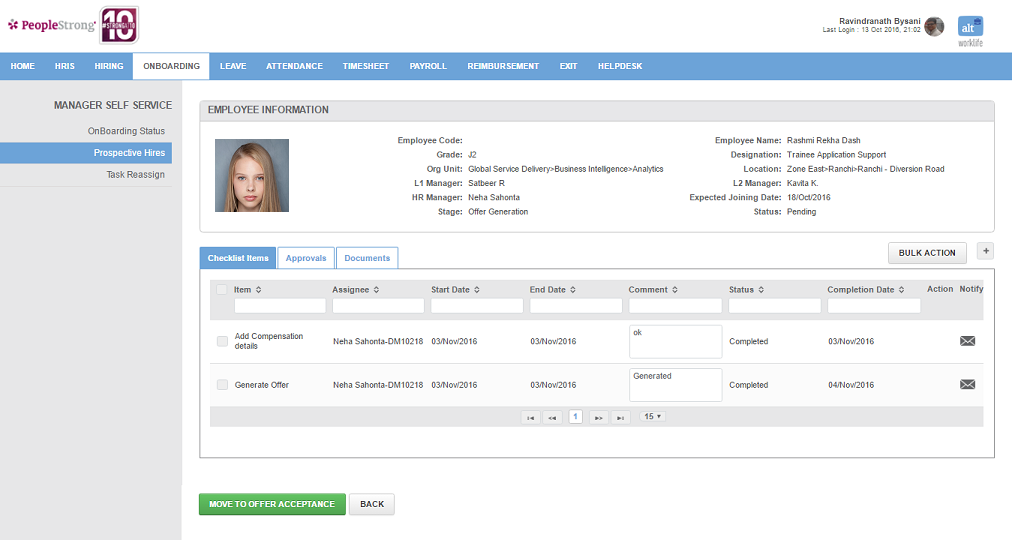
2. Click Move to Offer Acceptance button.
Note: Stage and Status columns now display Offer Acceptance and Pending respectively.
3. Following page will be displayed:
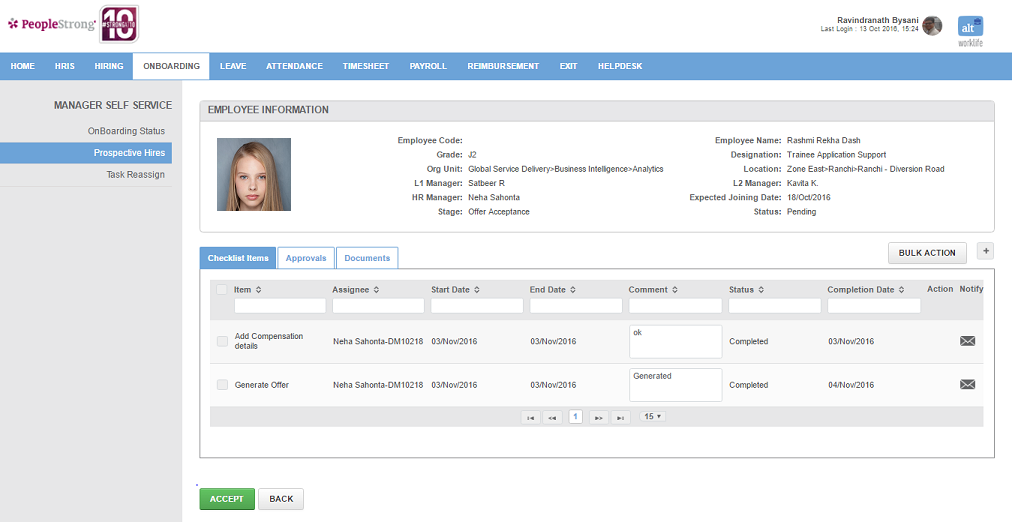
3. Click Accept button.
Note: Stage and Status columns now display Pre Joining and Pending respectively.

How to complete pre joining, joining and post joining processes?
Following pages will be displayed:
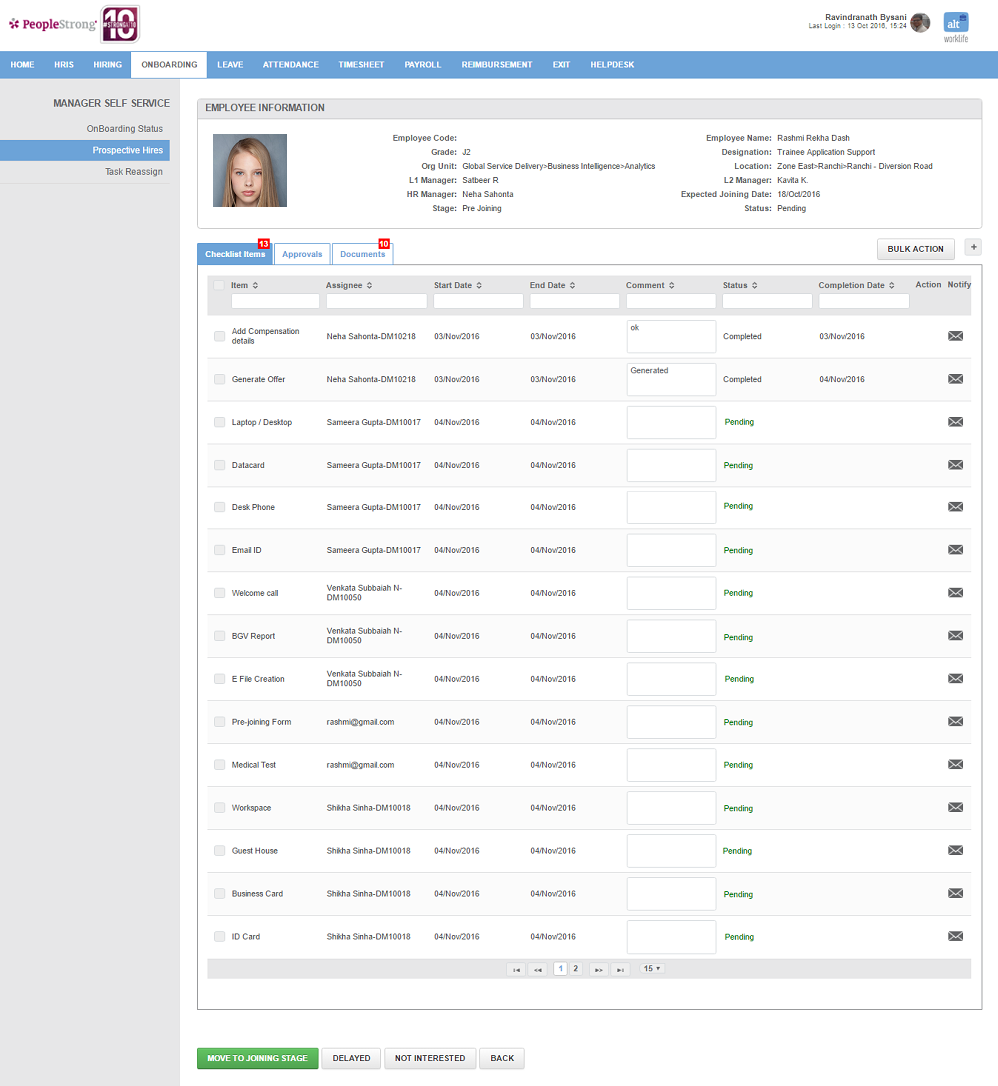
Pre Joining Process:
Following three actions can be performed:
a. Moving to Joining stage
b. Moving to Delayed Joining stage
c. Moving to Not Interested stage
Moving to Joining stage
1. Complete checklist items assigned to you.
2. If you see checklist items assigned to other managers/spocs in Pending stage, you can click  icon to notify the assignee (for them to complete checklist items). Following type of pop up will open:
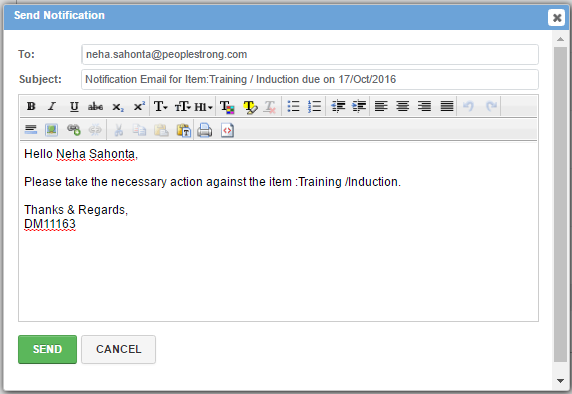
Note: a. A checklist item assigned to someone else cannot be completed by you.
b. If current date is earlier than end date, Status column will display Pending in GREEN, which means assignee has time to take action on the checklist item. If current date is later than end date, Status column will display Pending in RED, which means assignee has to take immediate action. Depending on the color of the Pending Status you can notify the assignee.
3. Click Send button.
Note: To complete tasks, go to How to complete tasks? on Onboarding Status page.
4. Click Documents tab. Following page will open.
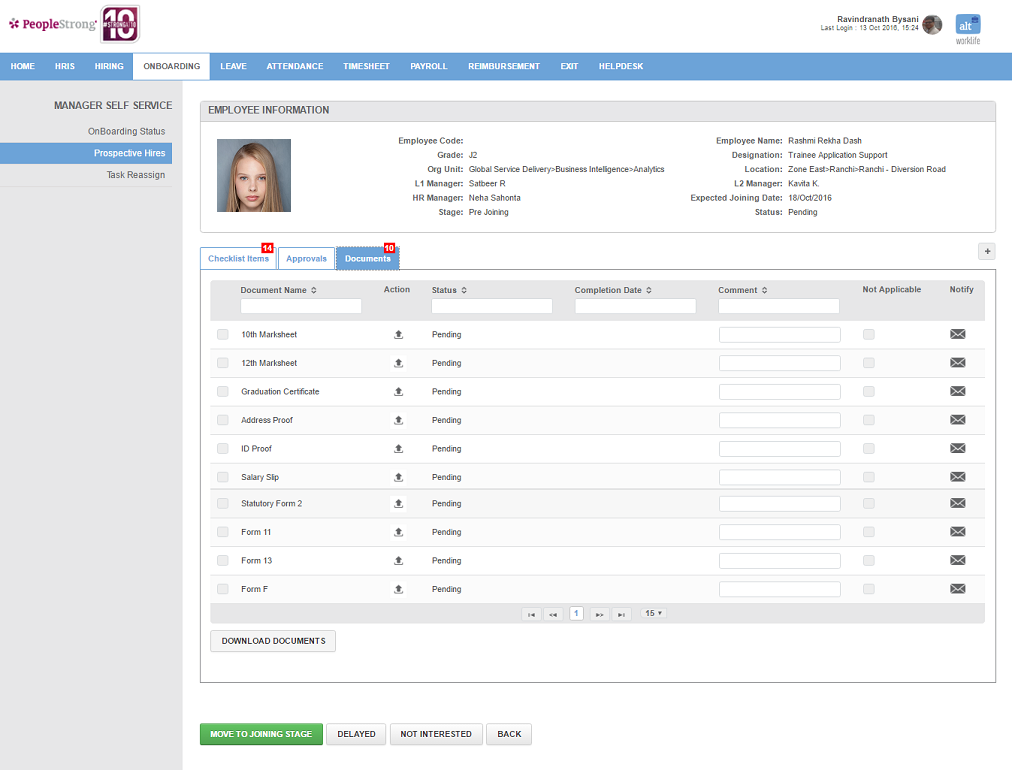
5. Click  icon to upload the documents.
6. Enter appropriate comments against the documents uploaded and not to be uploaded.
7. Select Not Applicable for the documents not being uploaded.
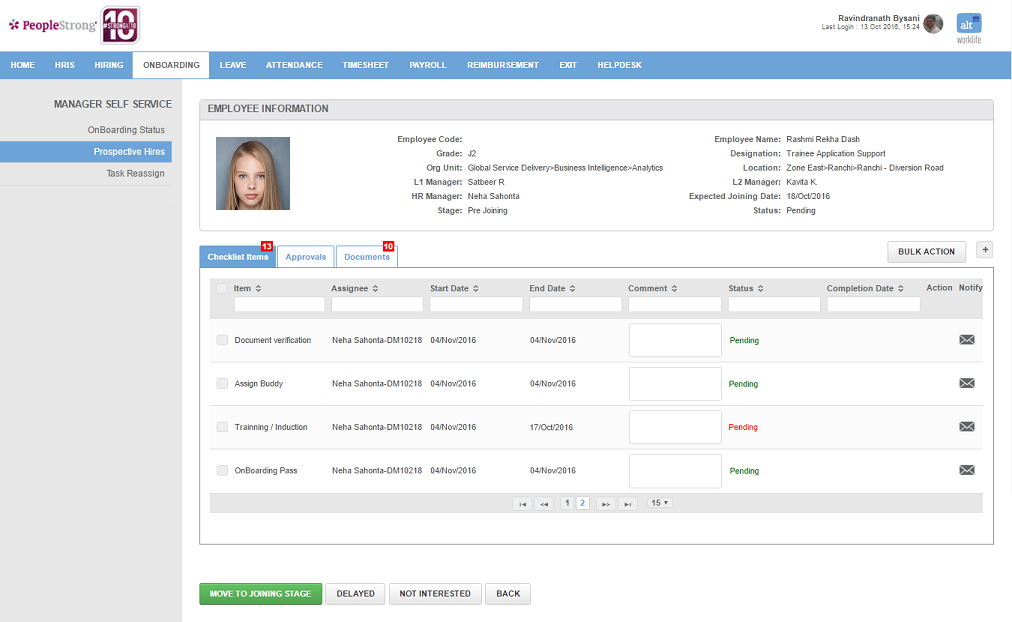
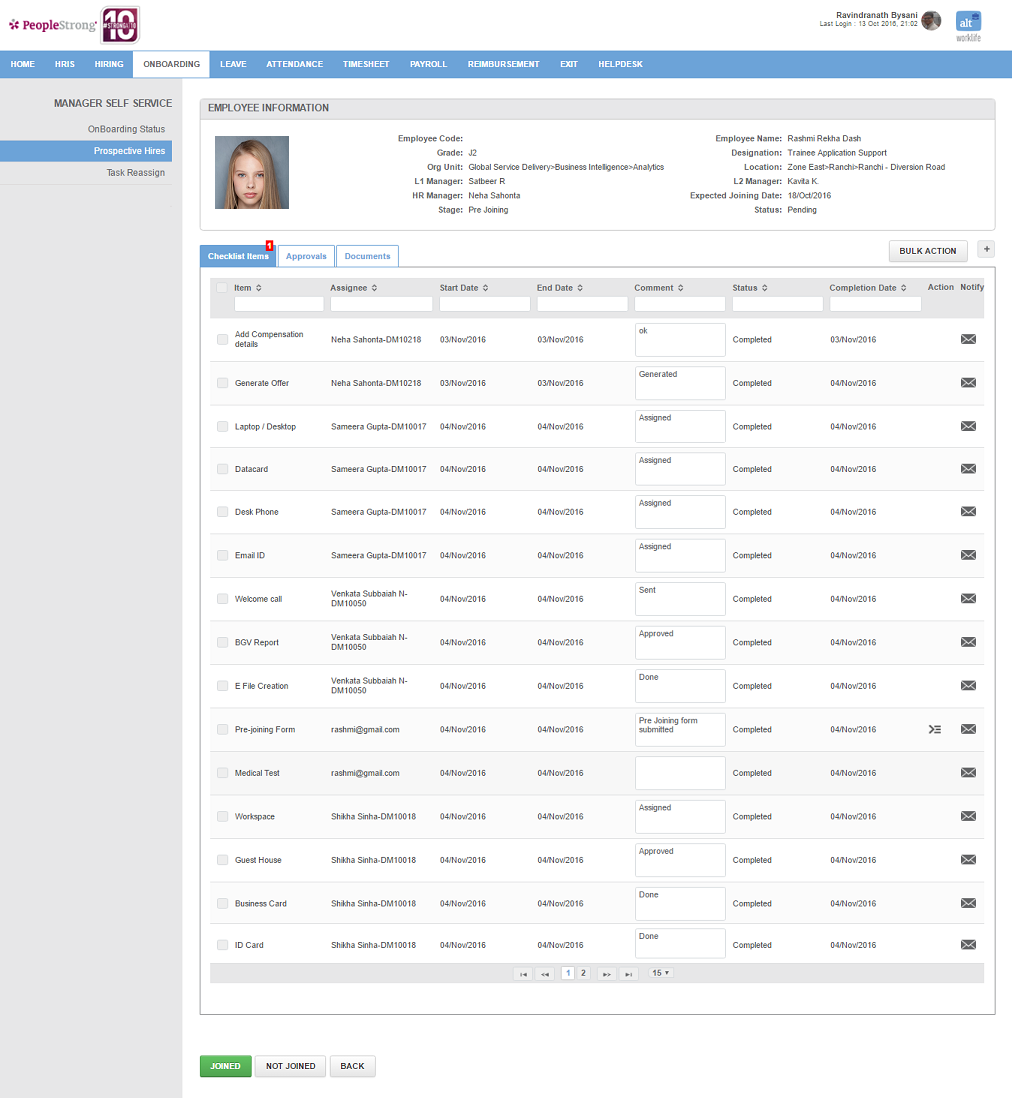
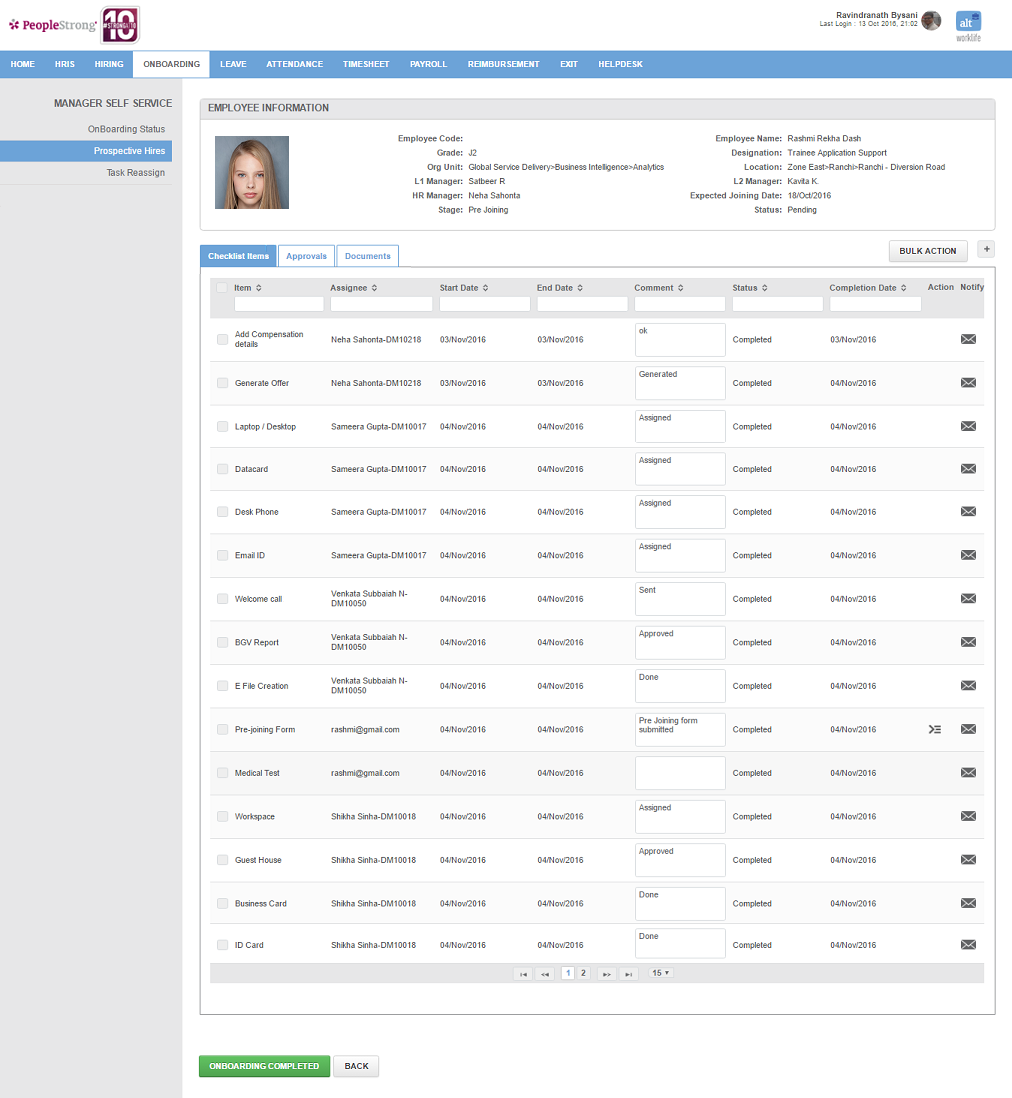
8. Click Checklist Items tab. Once checklist items have been approved by you and various managers/spocs, following pages will be displayed:
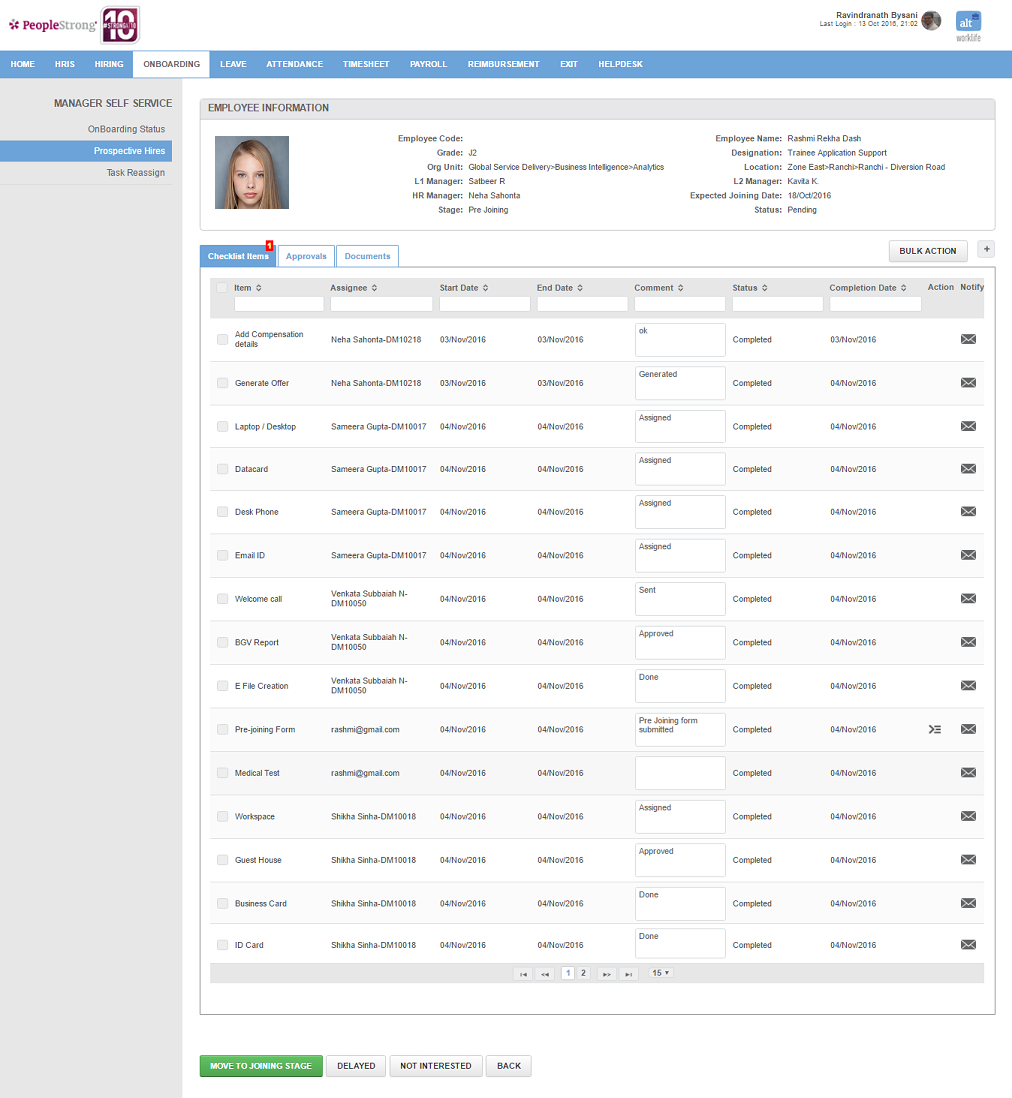
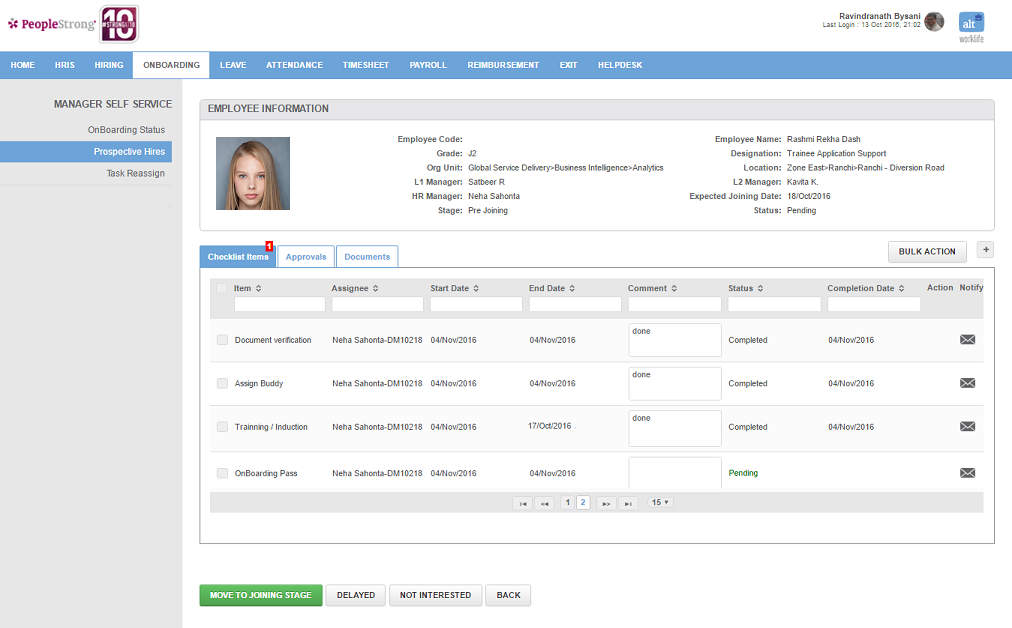
3. Click Move To Joining Stage button. Stage and Status columns display Joining and Yet to Join respectively.

Moving to Delayed Joining stage
1. Click Delayed button. Following pop up will open.
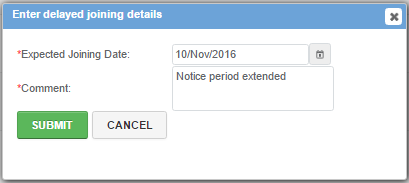
2. Click Submit button. Stage and Status columns now display Delayed Joining and Joining Delayed respectively.

Moving to Not Interested stage
1. Click Not Interested button. Following pop up will open:
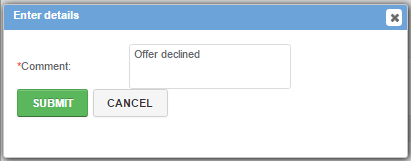
2. Click Submit button. Stage and Status columns display Onboarding and Dropped respectively.

Joining Process:
Following pages will be displayed:
Following two actions can be performed:
a. Moving to Joined stage
b. Moving to Not Joined stage
Moving to Joined stage
1. Repeat steps 1 to 3 of Moving to Joining stage.
2. Click Joined button. If actual joining date and expected joining date are different, following pop up will open.
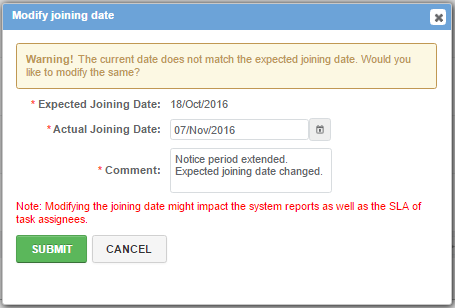
3. Enter actual joining date and comment.
4. Click Submit button. Stage and Status columns now display Post Joining and In Progress respectively.

Moving to Not Joined stage
1. If the candidate doesn't want to join, click Not Joined button. Following pop up will open.
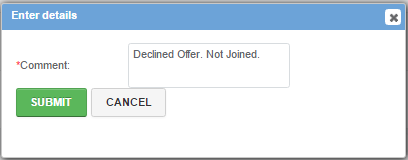
2. Enter a comment.
3. Click Submit button. Stage and Status columns display Onboarding and Dropped respectively.
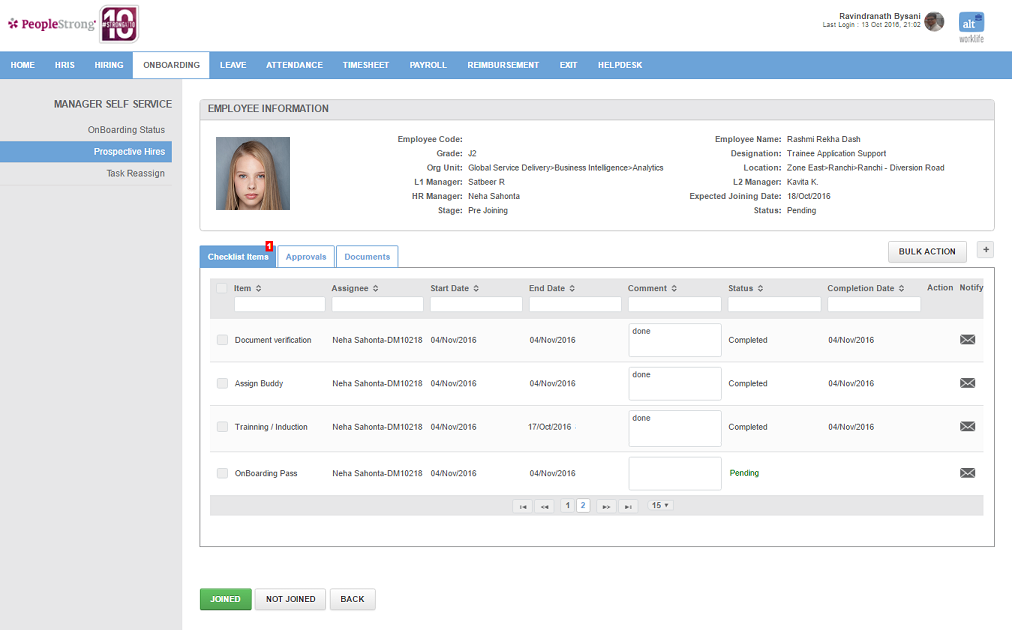
Post Joining Process
Following pages will be displayed:


1. Repeat steps 1 to 3 of Moving to Joining stage.
Following checklist items approval have been explained below:
ECN Generation:
1. Click  icon. Following pop up will open:
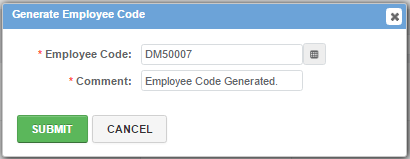
2. Click  icon. Employee Code will be auto generated.
3. Enter a comment.
4. Click Submit button.
Onboarding Pass:
1. Click icon. Following pop up will open:
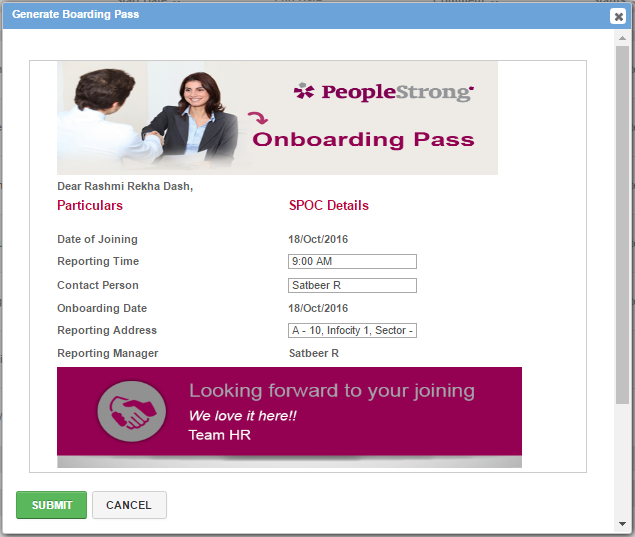
2. Enter Contact Person and Reporting Address.
3. Click Submit button.
Once checklist items have been approved by you and various managers/spocs, following pages will be displayed:
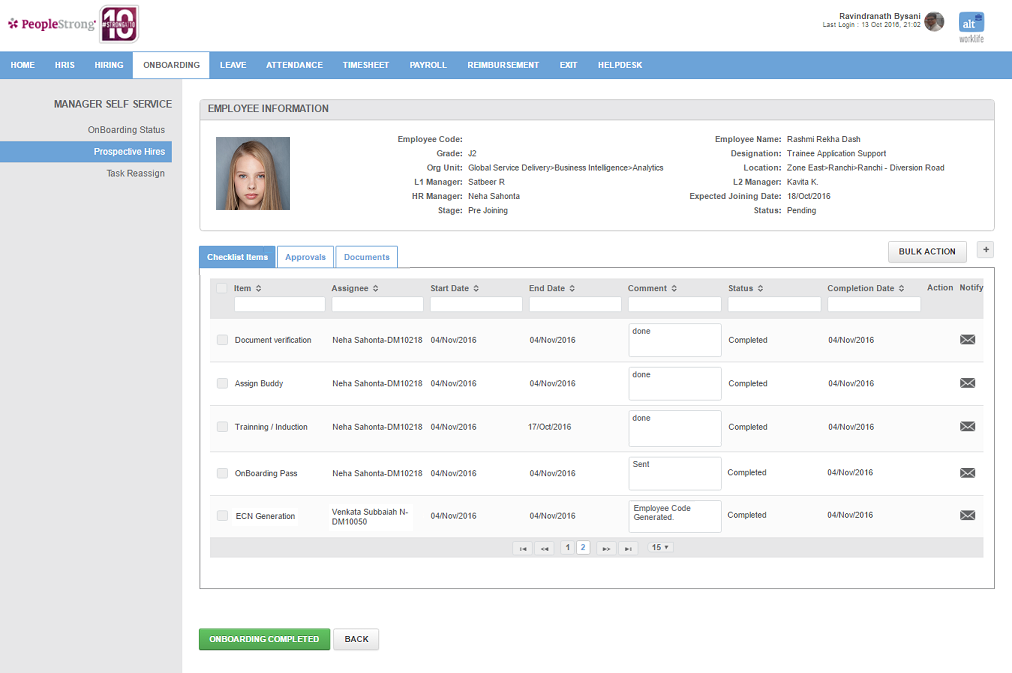
4. Click Onboarding Completed button. Stage and Status columns display Onboarding and Successful respectively.
Note: You can resend Onboarding portal www.hrms.peoplestrong.com/ob credentials to candidate for filling their details.
1. Click icon.
2. Click Resend Mail link. Following pop up will open.
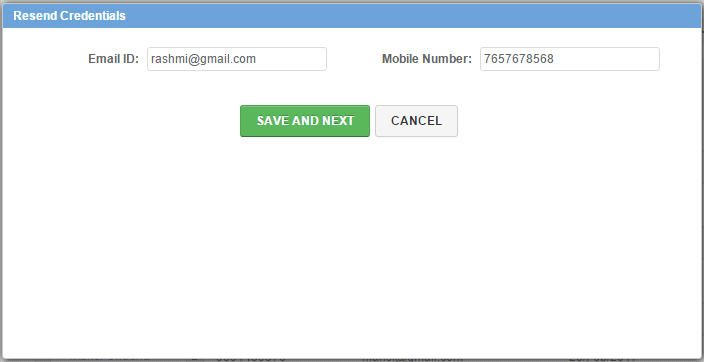
3. Click Save and Next button. Following will be displayed in the pop up.
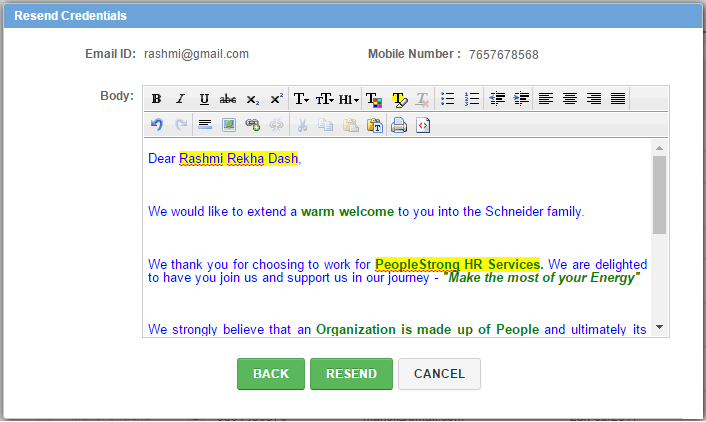
4. Click Resend button.